InstantSSL Certificate Installation: Apache & mod_ssl / OpenSSL
Step One: Copy your certificate to a file on your apache server
You will receive an email from Comodo with the certificate in the email. The certificate will be called ‘yourDOMAINNAME.crt‘ and will be within a *.zip file you have received as an email from us. When viewed in a text editor, your certificate will look something like this:
-----BEGIN CERTIFICATE-----
MIAGCSqGSIb3DQEHAqCAMIACAQExADALBgkqhkiG9w0BBwGggDCCAmowggHXAhAF
UbM77e50M63v1Z2A/5O5MA0GCSqGSIb3DQEOBAUAMF8xCzAJBgNVBAYTAlVTMSAw
(.......)
E+cFEpf0WForA+eRP6XraWw8rTN8102zGrcJgg4P6XVS4l39+l5aCEGGbauLP5W6
K99c42ku3QrlX2+KeDi+xBG2cEIsdSiXeQS/16S36ITclu4AADEAAAAAAAAA
-----END CERTIFICATE-----
Copy your Certificate into the same directory as your Private Key. In this example we will use ‘/etc/ssl/crt/‘. The private key used in the example will be labeled ‘private.key‘ and the public key will be ‘yourDOMAINNAME.crt‘.
Note: It is recommended that you make the directory that contains the private key file only readable by root.
Step Two: Install the Root and Intermediate Certificates
You will need to install the Root and Intermediate CA certificates in order for browsers and devices to trust your certificate. The Root and Intermediate CA certificates are contained within the ‘ca-bundle‘ file that was attached to your email in the *.zip file we sent you (this should be named ‘yourSERVERNAME.ca-bundle‘). In the relevant ‘Virtual Host’ section for your site, you will need to do the following to get this file correctly referenced:
a. First, copy the ‘yourSERVERNAME.ca-bundle‘ file to the same directory as the certificate and key files. As a reminder, in this example we called the directory ‘/etc/ssl/crt/‘.
b. Next, add the following line to the SSL section of the ‘httpd.conf‘ file. Again we assume that ‘/etc/ssl/crt/‘ is the directory to where you have copied the intermediate CA file. If the line already exists amend it to read the following:
SSLCertificateChainFile /etc/ssl/crt/yourSERVERNAME.ca-bundle
c. If you are using a different location and different certificate file names, you will need to change the path and filename to reflect the path and filename that you are using. The SSL section of the updated config file should now read:
SSLCertificateFile /etc/ssl/crt/yourDOMAINNAME.crt
SSLCertificateKeyFile /etc/ssl/crt/private.key
SSLCertificateChainFile /etc/ssl/crt/yourSERVERNAME.ca-bundle ***
d. Save your ‘config‘ file and restart Apache.
*** For Apache 1.x: Please use: SSLCACertificateFile /etc/ssl/crt/yourSERVERNAME.ca-bundleInstantSSL Certificate Installation: Oracle Wallet Manager
Before you install the Certificate issued, you are required to import the Trusted Root Certificate into Oracle Wallet Manager as per the following solution:
You can import a Trusted Root Certificate into a wallet in either two ways:
Paste the Trusted Root Certificate which can be downloaded from the Certificate Authority
Or
Import the Trusted Root Certificate which was downloaded from the Certificate Authority and saved to a text file.
Pasting the Trusted Root Certificate:
1. Download and copy of the Root and Intermediate certificate(s) which is required.
*Include the lines —–BEGIN CERTIFICATE—– and —–END CERTIFICATE—–
2. From the menu bar, choose ‘Operations > Import Trusted Certificate’
The ‘Import Certificate’ dialog box appears.
3. Choose the ‘Paste the Certificate’ button and choose ‘OK’
An ‘Import Trusted Certificate’ dialog box appears with the following message:
“Please provide a base64 format certificate and paste it below.”
4. Paste the certificate into the dialog box and choose ‘OK’
A message at the bottom of the window confirms that the trusted certificate was successfully installed.
You are then returned to the ‘Oracle Wallet Manager’ main panel and the trusted certificate appears at the bottom of the ‘Trusted Certificates’ tree.
Importing the Trusted Root Certificate from a saved text file:
1. Download and copy the Root Certificate which is required.
*Include the lines —–BEGIN CERTIFICATE—– and —–END CERTIFICATE—–
2. Copy and paste the output from the website into a Notepad and save it locally on your PC/server with a .txt extension.
3. From the menu bar, choose ‘Operations > Import Trusted Certificate’
The ‘Import Certificate(s)’ dialog box appears.
4. Enter the path or folder name of the certificate location.
5. Select the name of the trusted certificate file.
6. Choose ‘OK’.
A message at the bottom of the window confirms that the trusted certificate was successfully installed.
You are then returned to the ‘Oracle Wallet Manager’ main panel and the trusted certificate appears at the bottom of the ‘Trusted Certificates’ tree.
Note: Remember to save changes to the Wallet before closing the Wallet
InstantSSL Certificate Installation: Plesk Server Administrator
Installing your Certificate with Plesk Server Administrator
Important: Installation is a two step process – ensure you follow both steps listed below.
Step 1: Upload your SSL certificate
From inside PSA, choose the domain in which you are installing the SSL certificate.
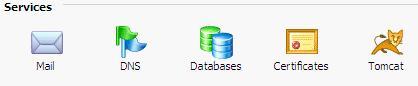
Access the domain’s SSL section by clicking on the ‘certificate’ button.
When a CSR (certificate signing request) is generated there are two different text sections, the RSA Private Key (which was emailed to you by Plesk) and the Certificate Request. When installing a certificate, the RSA Private Key text needs to be pasted into the block preceding the web server site certificate. Example:
-----BEGIN RSA PRIVATE KEY-----
[[ENCODED BLOCK OF TEXT]]
-----END RSA PRIVATE KEY-----
-----BEGIN CERTIFICATE-----
[[ENCODED BLOCK OF TEXT]]
-----END CERTIFICATE-----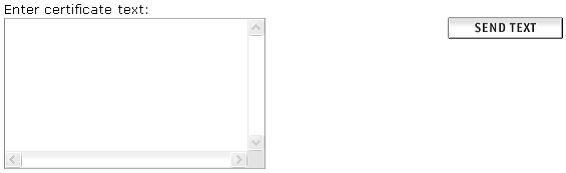
If successful a message is returned ‘Certificate Successfully Installed’.
If there are any errors the old certificate will replace the new certificate that you have just sent to the server and you will be required to enter it again.
Now click Up Level to return to the Domain Administration page.
Step 2: Uploading the Rootchain Certificate
To ensure your certificate is trusted by all browsers you need to install a rootchain certificate for the domain.
From inside PSA, choose the domain in which you are installing the SSL certificate.
Access the domain’s SSL section by clicking on the ‘certificate’ button.
The icon next to Use rootchain certificate for this domain appears on this page.
If the icon is [ON] then the rootchain certificate will be enabled for this domain. If the icon is [X] then it is disabled.
Ensure the icon is [X] before continuing (you may need to click the ON/OFF button if the icon is set to [ON]):

Click the browse button and locate the Intermediate CA file (located in the zip file sent to you and also available for download from the support section of the website) you have saved from your issuance email from comodo earlier.
Then click the Send File button. This will upload your Intermediate certificate to the server.
Click the icon again to set it to the [ON] state.
Now click Up Level to return to the Domain Administration page.
Using your SSL Certificate to secure logging into your Plesk Administrator
If you are applying your certificate to the Plesk control panel (in order to secure your login) you will need to login to Plesk Administrator and select Server.
Select Certificate and complete the above instructions as per applying your SSL certificate to a domain.
InstantSSL Certificate Installation: Plesk 7 & 8
Plesk 7 & 8 Certificate Installation
Login to the Plesk 7 Control Panel.
From the left hand menu, select ‘Domains’

Click on the domain name that the certificate is for

Click on the ‘Certificates’ menu item.
There is a button in the middle of the page labelled ‘Browse’. Click ‘Browse’ and navigate to the location of the saved site certificate you received from Comodo. Selecting it, then select ‘Send File’, this will upload and install the certificate against the corresponding Private Key

The certificate name will now appear in the list of certificates at the bottom of the page
Click on the name of the Certificate from the list.
The box on the page labeled ‘CA Certificate’. You will need to paste both the Intermediate CA certificate and Root certificates from the .zip file you have received into this box.
They must be pasted this in order, the Intermediate CA certificate first, followed by the Root certificate, the result will look similar to the
example below (Please note: no blank line between then end of one certificate and the start of the next):
  -----BEGIN CERTIFICATE-----
  MIIEyDCCBDGgAwIBAgIEAgACmzANBgkqhkiG9w0BAQUFADBFMQswCQYDVQQGEwJV
  UzEYMBYGA1UEChMPR1RFIENvcnBvcmF0aW9uMRwwGgYDVQQDExNHVEUgQ3liZXJU
  .....
  zs1x+3QCB9xfFScIUwd21LkG6cJ3UB7KybDCRoGAAK1EqlzWINlVMr5WlvHqvaDj
  vA2AOurM+5pX7XilNj1W6tHndMo0w8+xUengDA==
  -----END CERTIFICATE-----
  -----BEGIN CERTIFICATE-----
  MIIB+jCCAWMCAgGjMA0GCSqGSIb3DQEBBAUAMEUxCzAJBgNVBAYTAlVTMRgwFgYD
  VQQKEw9HVEUgQ29ycG9yYXRpb24xHDAaBgNVBAMTE0dURSBDeWJlclRydXN0IFJv
  .....
  IjeaY8JIILTbcuPI9tl8vrGvU9oUtCG41tWW4/5ODFlitppK+ULdjG+BqXH/9Apy
  bW1EDp3zdHSo1TRJ6V6e6bR64eVaH4QwnNOfpSXY
  -----END CERTIFICATE-----
Click the ‘Send Text’ button.
Now click ‘Up Level’ from the top right of the screen and choose ‘Setup’

At the top of the page, change the ‘SSL Certificate’ drop-down menu to the certificate you have just installed.

NOTE: The example above shows a shared IP.
If there is no Certificate drop-down box on the screen, this means that you are on a shared hosting account, therefore you need to upgrade your hosting package and purchase a dedicated IP address from your hosting provider
Click the ‘Server’ item from the left hand menu
Click on the ‘Service Management’ menu item
You now need to Stop and Start the Apache process

NOTE: Restarting Apache will NOT work. You must stop the service, then start it again to complete the installation
NOTE:When you add a certificate, it is not installed automatically onto the domain or assigned to an IP address, but only added to the Certificate repository.
InstantSSL Certificate Installation: Apple Mac OS X Server
1. Log into your server as root.
2. If it doesn’t already exist on your server, create a folder with this name:
/etc/httpd/ssl.crt/
3. Copy the cert.crt into the folder.
b. Install your certificate
Important: Back up the certificate to a removable disk. It will save time if there is a server failure you can restore your certificate.
To enable SSL on the site follow the instructions below:
1. In Server Admin, click Web and choose Configure Web Service.
2. Make sure Enable SSL support is selected for the entire site.
3. Click Sites, then select the site where you plan to use the certificate, and click Edit.
4. Select Enable Secure Socket Layer (SSL)
5. Click Edit Certificate File and paste the text from your certificate file in the text field, then click Save.
6. Click Edit Key File and paste the text from your key file (mykey.key, set up earlier) in the text field, then click Save.
7. Press tab to move to the phrase field and type the pass phrase from your CSR in the text field, then click OK.
8. Set the location of the log file
9. Stop and then start Web service.
Note: Web Performance Cache is not compatible with SSL. You should not enable both Web Performance Cache and SSL for a specific site. Doing so keeps Apache from starting. For more information please view Mac OS X Server 10.2 and Later
InstantSSL Certificate Installation: BEA Systems Weblogic
BEA Weblogic Certificate Installation Instructions
When you receive your certificates you need to store them in the mydomain directory.
Note: If you obtain a private key file from a source other than the Certificate Request Generator servlet, verify that the private key file is in PKCS#5/PKCS#8 PEM format.
To use a certificate chain, append the additional PEM-encoded digital certificates to the digital certificate that issued for the WebLogic Server (the intermediate CA certificate). The last digital certificate in the file chain will be the Root certificate that is self-signed. (example below:)
-----BEGIN CERTIFICATE-----
MIIB+jCCAWMCAgGjMA0GCSqGSIb3DQEBBAUAMEUxCzAJBgNVBAYTAlVTMRgwFgYD
.....(your Intermediate CA certificate).....
bW1EDp3zdHSo1TRJ6V6e6bR64eVaH4QwnNOfpSXY
-----END CERTIFICATE-----
-----BEGIN CERTIFICATE-----
MIIE0DCCA7igAwIBAgIQMKeebbHpGVqxyFDTln1j1TANBgkqhkiG9w0BAQUFADBv
.....(your Root CA certificate).....
WjEZgqr9NaoNZCZpyfZxPsOFYzoxLYEmJs3AJHxkhIHg6YQU
-----END CERTIFICATE-----Configure WebLogic Server to use the SSL protocol, you need to enter the following information on the SSL tab in the Server Configuration window:
In the Server Certificate File Name field, enter the full directory location and name of the digital certificate for WebLogic Server.
In the Trusted CA File Name field, enter the full directory location and name of the digital certificate for Comodo who signed the digital certificate of WebLogic Server. In the Server Key File Name field, enter the full directory location and name of the private key file for WebLogic Server.
Use the following command-line option to start WebLogic Server. -Dweblogic.management.pkpassword=password where password is the password defined when requesting the digital certificate.
Storing Private Keys and Digital Certificates
Once you have a private key and digital certificate, copy the private key file generated by the Certificate Request Generator servlet and the digital certificate you received into the mydomain directory. Private Key files and digital certificates are generated in either PEM or Definite Encoding Rules (DER) format. The filename extension identifies the format of the digital certificate file. A PEM (.pem) format private key file begins and ends with the following lines, respectively:
-----BEGIN ENCRYPTED PRIVATE KEY-----
-----END ENCRYPTED PRIVATE KEY----------BEGIN CERTIFICATE-----
-----END CERTIFICATE-----Note: Typically, the digital certificate file for a WebLogic Server is in one file, with either a .pem or .der extension, and the WebLogic Server certificate chain is in another file. Two files are used because different WebLogic Servers may share the same certificate chain.
The first digital certificate in the certificate authority file is the first digital certificate in the WebLogic Server’s certificate chain. The next certificates in the file are the next digital certificates in the certificate chain. The last certificate in the file is a self-signed digital certificate that ends the certificate chain. A DER (.der) format file contains binary data. WebLogic Server requires that the file extension match the contents of the certificate file.
Note: If you are creating a file with the digital certificates of multiple certificate authorities or a file that contains a certificate chain, you must use PEM format. WebLogic Server provides a tool for converting DER format files to PEM format, and visa versa.
InstantSSL Certificate Installation: IBM HTTPServer
Using IKEYMAN for Certificate Installation
Comodo send more than one certificate. In addition to the certificate for your server Comodo send an Intermediate CA Certificate (the Comodo certificate) and a Root CA Certificate. Before installing the server certificate, install both of these certificates. Follow the instructions in ‘Storing a CA certificate’.
Note: If the authority who issues the certificate is not a trusted CA in the key database, you must first store the CA certificate and designate the CA as a trusted CA. Then you can receive your CA-signed certificate into the database. You cannot receive a CA-signed certificate from a CA who is not a trusted CA. For instructions see ‘Storing a CA certificate’.
Storing a CA Certificate:
- Enter IKEYMAN on a command line on UNIX, or start the Key Management utility in the IBM HTTP Server folder on Windows®.
- Select Key Database File from the main User Interface, select Open.
- In the Open dialog box, select your key database name. Click OK.
- In the Password Prompt dialog box, enter your password and click OK.
- Select Signer Certificates in the Key Database content frame, click the Add button.
- In the Add CA Certificate from a File dialog box, select the certificate to add or use the Browse option to locate the certificate. Click OK.
- In the Label dialog box, enter a label name and click OK.
To receive the CA-signed certificate into a key database:
- Enter IKEYMAN on a command line on UNIX, or start the Key Management utility in the IBM HTTP Server folder on Windows®.
- Select Key Database File from the main User Interface, select Open.
- In the Open dialog box, select your key database name. Click OK.
- In the Password Prompt dialog box, enter your password, click OK.
- Select Personal Certificates in the Key Database content frame and then click the Receive button.
- In the Receive Certificate from a File dialog box, select the certificate file. Click OK.
InstantSSL Certificate Installation: IBM Websphere
IBM WebSphere Advanced Single Server Edition 4.0
Before being able to enable SSL on WebSphere, you need to have your own certificate. This certificate can be a self-certificate for testing purpose but in any production case, you should have a certificate issued by a Trusted CA. The following steps describe how to get your own certificate and later how to configure WebSphere to use it.
Installing a certificate chain
Before you can add your certificate into the keystore, you must first include the certificates chain. You must install the following public certificates:
| Root (AddTrustExternalCARoot.crt) | Root |
| Primary Server certificate(UTNAddTrustServerCA.crt) | PrimServer |
You can add the certificates chain from the Signer Certificates screen as shown below:

Click on the Add button. A dialog box will appear where you have to enter the data, the Certificate file name (the certificate file you received) and its location. Once all of this information is entered click on OK.
Installing your site certificate
You can import the site certificate into your keystore easily. After opening the IBM Key Management console, please select the option ‘Personal Certificates’ in the drop down within the ‘Key Database Content’ area as shown in the following screen: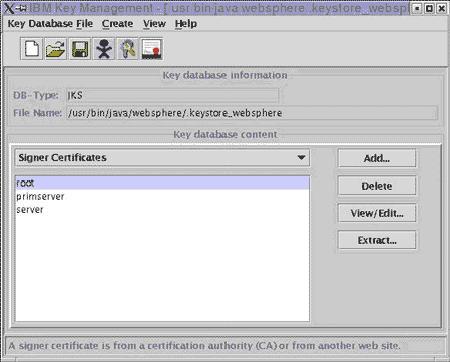
Once you’ve selected ‘Personal Certificates’, please click on the ‘Receive’ button. A dialog box will appear in which you must enter the data required, the certificate file name (the certificate file you received) and its location. Once all of this information is entered click ‘OK’. This will configure your keystore correctly.
Enabling SSL
Once your keystore has been successfully configured with your certificate, you can enable SSL in WebSphere Application Server.
InstantSSL Certificate Installation: Microsoft IIS 4.x
Step 1. Install the Server file certificate using Key Manager
Go to Key Manager.
Install the new IIS SSL Server certificate by clicking on the key in the www directory (usually a broken key icon with a line through it), and select “Install Key Certificate”.
Enter the Password.
When you are prompted for bindings, add the IP and Port Number. “Any assigned” is acceptable if you do not have any other IIS SSL certificates installed on the web server.
Note: Multiple certificates installed on the same web server will require a separate IP Address for each because SSL does not support host headers.
Go to the Computers menu and select the option “Commit Changes”, or close Key Manager and select “Yes” when prompted to commit changes.
The new IIS SSL Server certificate is now successfully installed.
Back up the Key in Key Manager by clicking on Key menu> Export -> Backup File. Store the backup file on the hard drive AND off the server.
Step 2: Installing the Root & Intermediate Certificates:
Your IIS SSL Certificate will have been emailed to you. The email will also contain two other Certificates: the ROOT certificate and Intermediate CA certificate .Save these Certificates to the desktop of the web server machine.
It is essential that you have installed these two Certificates on the machine running IIS 4. You may also download them from the support section of the website:
Once you have installed the Certificates, restart the machine running IIS 4. You must now complete one of the following procedures – the procedure you follow is dependent on the Service Pack that has been implemented on your machine running IIS4.
Service Pack 3:
Install the above certificates in your Internet Explorer by opening each certificate and clicking “Install Certificate”.
Service Pack 4:
Install the above certificates manually in a specific root store (you may also want to read (see Microsoft Knowledge Base Q194788):
Install the Root certificate by double clicking on the corresponding file this will start an installation wizard
select Place all certificates in the following store and click browse
select Show physical stores
select Trusted Root Certification Authorities
select Local Computer, click OK
back in the wizard, click Next, click Finish
Repeat the same for the Intermediate CA Certificate however choose to place the certificates in the Intermediate Certification Authorities store.
Service Pack 5:
Same as SP4.
Service Pack 6:
Same as SP5.
Reboot the web server to complete the installation.
InstantSSL Certificate Installation: Java-based webservers
Installing your Certificate on Java Based Web Servers
You will receive 3 files in a zip file from Comodo.
These must be imported in the correct order:
Root
Intermediate CA
domain/site certificate
Please replace the example keystore name ‘domain.key’ with your keystore name
Use the keytool command to import the certificates as follows:
keytool -import -trustcacerts -alias root -file (ROOT CERTIFICATE FILE NAME) -keystore domain.keykeytool -import -trustcacerts -alias INTER -file (INTERMEDIATE CA FILE NAME) -keystore domain.keyUse the same process for the site certificate using the keytool command, if you are using an alias then please include the alias command in the string. Example:
keytool -import -trustcacerts -alias yyy (where yyy is the alias specified during CSR creation) -file domain.crt -keystore domain.keyEXAMPLE BELOW :
The password is then requested.
Enter keystore password: (This is the one used during CSR creation)
The following information will be displayed about the certificate and you will be asked if you want to trust it (the default is no so type ‘y’ or ‘yes’):
Owner: CN= Root, O=Root, C=US
Issuer: CN=Root, O=Root, C=US
Serial number: 111111111111
Valid from: Fri JAN 01 23:01:00 GMT 1990 until: Thu JAN 01 23:59:00 GMT 2050
Certificate fingerprints:
MD5: D1:E7:F0:B2:A3:C5:7D:61:67:F0:04:CD:43:D3:BA:58
SHA1: B6:GE:DE:9E:4C:4E:9F:6F:D8:86:17:57:9D:D3:91:BC:65:A6:89:64
Trust this certificate? [no]:
Then an information message will display as follows:
Certificate was added to keystore
All the certificates are now loaded and the correct root certificate will be presented.
InstantSSL Certificate Installation: Lotus Domino Go 4.6.2.6+
IBM-Lotus Domino Go 4.6.2.6+ Certificate Installation
Installing your Web Server Certificate
Your certificate will be sent to you by email. The email message includes the web server certificate that you purchased in the body of the email message. Copy the certificate from the body of the email and paste it into a text editor (such as notepad) to create text files. Name this file “Server.txt”.
Installing the Root and Intermediate Certificates
Create 2 text files. The first file should be the Root Certificate. Name this file “root.txt”. The second file should be the Intermediate CA Name this file “inter.txt”.
Note: Be sure to include the —–BEGIN CERTIFICATE—– line and the ——END CERTIFICATE—– line. < p password. the for prompted be will You keyfile.kyr). (usually file of name Type file. ring key existing an open to O Select mkkf typing by utility MKKF Start>
Note: If you start the ‘mkkf’ utility from the directory that contains your certificates you will not need to include the path.
Select R to receive a certificate into the Key Ring File
You will be prompted for the file name. Enter root.txt
Enter Root certificate name (the file name supplied on the file) for the label
Press ‘Enter’ to continue
Select W to work with Keys and Certificates
Select L to List/Select the key to work with
Find the entry you made above (the file name supplied on the file) and select S to select this menu
Select T to mark this as a ‘Trusted’ root
Select Y – Yes, to confirm this request
Press ‘Enter’ to return to the pervious menu
Select X to exit the menu
Repeat from ‘Select R’ using the Comodo Intermediate certificate
Substitute root.txt with intermediate.txt
Substitute Root certificate name (the file name supplied on the file) with Intermediate CA certificate name (the file name supplied on the file)
Installing your Web Server Certificate
From the main menu of the mkkf utility, select R to Receive a certificate into a Key Ring File
Enter the server certificate file name (eg. “server.txt”)
Select W to Work with keys and certificates
Select L to List/Select the key to work with. Select N until you find the required file
Select S to Select this certificate
Select F to mark this key as the selected default key
Select X to exit this menu
Select C to Create a ‘stash file’ for the key ring
Note: This is an important step, which is often overlooked
Select X to exit the menu
Select Y – Yes, to save all changes to the key file and confirm the update
Enabling SSL on your Domino Go Web Server
Access the web server via your browser. Select ‘Configuration and Administration Forms’
Scroll down to security. Select Security Configuration
Ensure ‘Allow SSL connections using port 443’ is selected
Ensure that the correct Key Ring file is listed
Apply the changes
You will then need to restart your Web Server
InstantSSL Certificate Installation: Lotus Domino server
Installing the certificates on Lotus Domino Server requires the certificates to be merged into the Key Ring file.
This process must be completed for both root certificates provided.
In Notes, from the administration panel, click System Databases and choose Open Domino Server Certificate Administration (CERTSRV.NSF) on the local machine.
Click Install trusted root Certificate into Key Ring (option 3).
Enter the file name for the Key Ring that will store this certificate. The Key Ring file was created when you created the server Certificate Signing Request.
Select the correct certificate file from the zip file that was sent to you by email.
Select File in the “Certificate Source” field. Enter the file name in the file name field.
You will need to import the certificates in the below order
Root Certificate (supplied in zip file)
Intermediate CA Certificate (supplied in zip file)
Click “Merge Certificate into Key Ring.”
Enter the password for the server key ring file and click OK to approve the merge.
Once all of the root certificates are installed you will need to install the site certificate following the below instructions
Click Install Certificate into Key Ring (Option 4).
Enter the file name for the Key Ring that will store this certificate. The Key Ring file was created when you created the server Certificate Signing Request.
Detach the file from the email to your hard drive and unzip it.
Select File in the “Certificate Source” field. Enter the file name in the file name field.
Click “Merge Certificate into Key Ring.”
Enter the password for the server key ring file and click OK to approve the merge.
InstantSSL Certificate Installation: Microsoft IIS 5.x & 6.x
1. Select Administrative Tools
2. Start Internet Services Manager
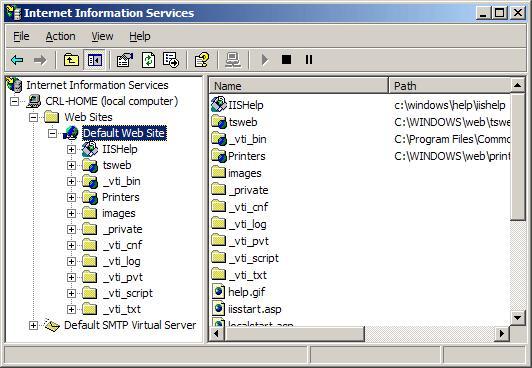
3. Open the properties window for the website. You can do this by right clicking on the Default Website and selecting Properties from the menu
4. Open Directory Security by right clicking on the Directory Security tab
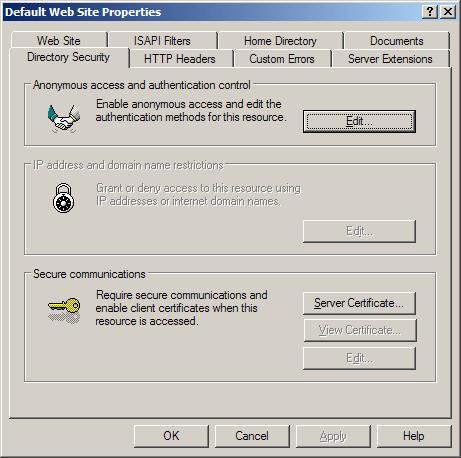
5. Click Server Certificate. The following Wizard will appear:
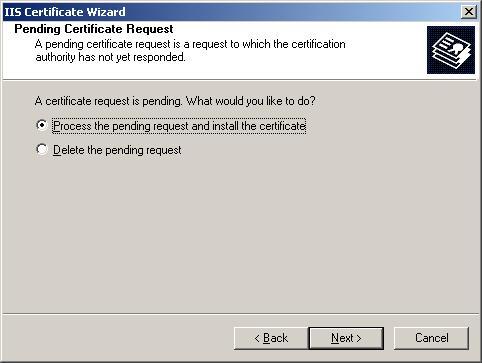
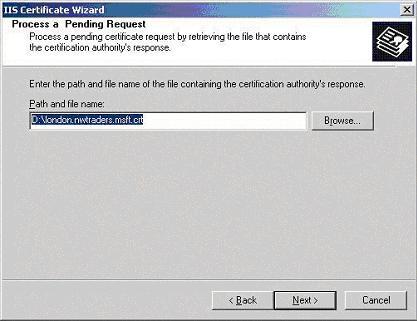
6. Choose to Process the Pending Request and Install the Certificate. Click Next
7. Enter the location of your IIS SSL certificate (you may also browse to locate your IIS SSL certificate), and then click Next
8. Read the summary screen to be sure that you are processing the correct certificate, and then click Next
9. You will see a confirmation screen. When you have read this information, click Next
10. You now have an IIS SSL server certificate installed
Important: You must now restart the computer to complete the install
If you need to install the Root and Intermediate certificates manually, please see manual installation of Root and Intermediate Certificates
Certificate Installation: Microsoft IIS 7.x
Install to Web Server
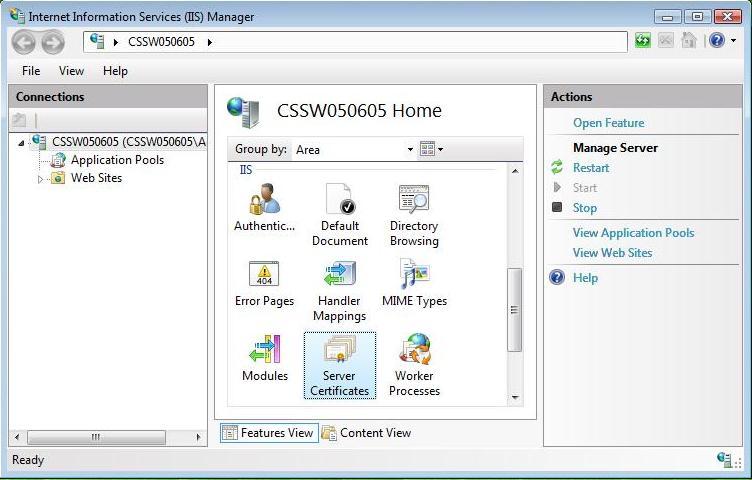
1. Open Internet Information Services Manager (IISM) to the appropriate ServerStart -> Administrative Tools -> IISM -> Server Name
2. Open the Server Certificates icon.
3. Open ‘Complete Certificate Request’ Wizard
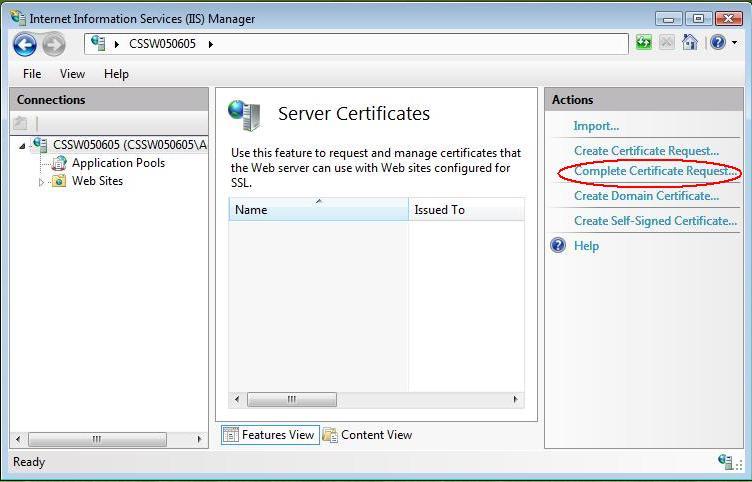
From the ‘Actions’ Menu on the left select ‘Complete Certificate Request’
4. Proceed to Complete Certificate Request’ Wizard
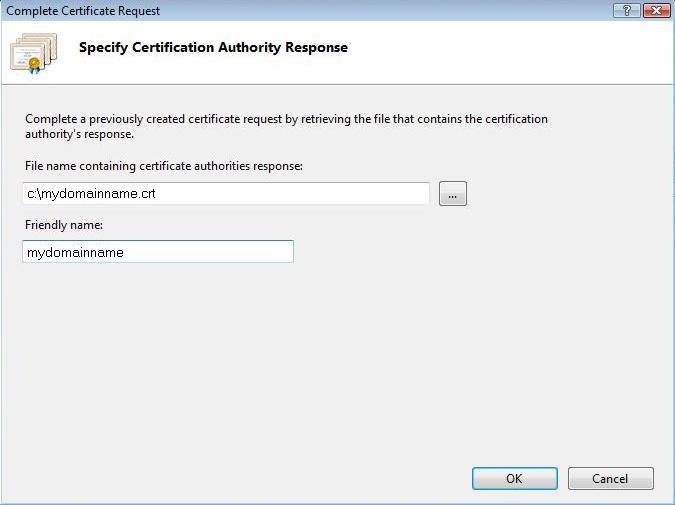
Fill out all appropriate information. You may need to browse to the location of the certificate or you may enter it in the provided box. The friendly is not part of the certificate itself, but is used by the server administrator to easily distinguish the certificate.
Note: There is a known issue in IIS 7 giving the following error: “Cannot find the certificate request associated with this certificate file. A certificate request must be completed on the computer where it was created.” You may also receive a message stating “ASN1 bad tag value met”. If this is the same server that you generated the CSR on then, in most cases, the certificate is actually installed. Simply cancel the dialog and press “F5” to refresh the list of server certificates. If the new certificate is now in the list, you can continue with the next step. If it is not in the list, you will need to reissue your certificate using a new CSR (see our CSR creation instructions for IIS 7). After creating a new CSR, login to your Comodo account and click the ‘replace’ button for your certificate.
Assign to Website
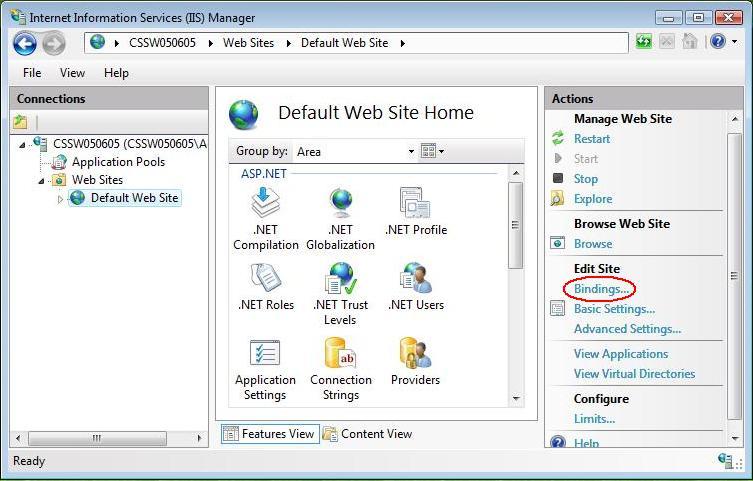
1. Navigate back to the root of the appropriate website. The center of the window should say “Default Website Home” or whatever the name of the website is.
2. Select ‘Bindings’ from the ‘Edit Site’ sub menu.
3. Add Port 443
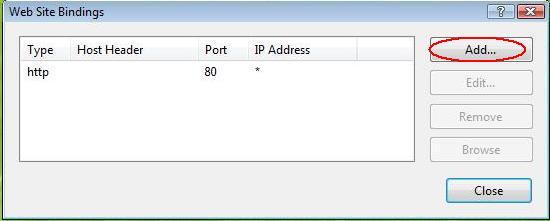
In the ‘Site Bindings’ window, click ‘Add’. This will open the ‘Add Site Binding’ window.
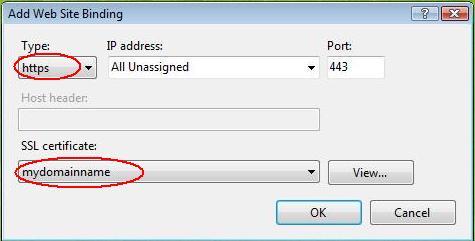
Under ‘Type’ choose https. The IP address should be the IP address of the site or All Unassigned, and the port over which traffic will be secured by SSL is usually 443. The ‘SSL Certificate’ field should specify the certificate that was installed using the above steps.
Click ‘OK’ to save changes.
Note: There may already be an ‘https’ entry in this area. If so, click ‘https’ to highlight it. Then click ‘Edit’ and in the ‘SSL certificate’ area select the friendly name that was generated earlier. Click ‘OK’ to save changes.
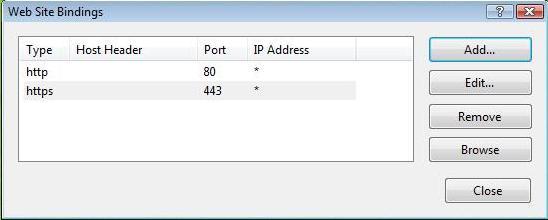
Click ‘OK’ on the ‘Web Site Bindings’ Window to complete the install.
Important: You must now restart IIS / the website to complete the install of the certificate.
Related Articles
Root and Intermediate Certificate installation via MMC
Using the DigiCert Certificate Utility to Sign Your Code
Microsoft is changing the process for signing your kernel-mode driver packages
Starting in 2021, Microsoft will be the sole provider of production kernel-mode code signatures. You will need to start following Microsoft’s updated instructions to sign any new kernel-mode driver packages going forward. To lean more, see our knowledge base article—Microsoft sunsetting support for cross-signed root certificates with kernel-mode signing capabilities.
If you have not yet ordered your Code Signing Certificate, visit our EV Code Signing Certificates.
After installing your DigiCert Code Signing Certificate on your Windows server or workstation, use the DigiCert® Certificate Utility for Windows to:
Sign your code – How to Sign Your Code with the DigiCert Utility.
- Check your file’s code signing signature – How to Check Your File’s Signature
How to Sign Your Code with the DigiCert Utility
If you are using an EV Code Signing Certificate, plug in your token/device now.
On your Windows server or workstation, download and save the DigiCert® Certificate Utility for Windows executable (DigiCertUtil.exe).
Run the DigiCert® Certificate Utility for Windows.
Double-click DigiCertUtil.
In the DigiCert Certificate Utility for Windows©, click Code Signing (blue and silver shield), select the Code Signing Certificate that you want to use to sign your code, and then, click Sign Files.
If you do not see your EV Code Signing Certificate, plug in your token now.
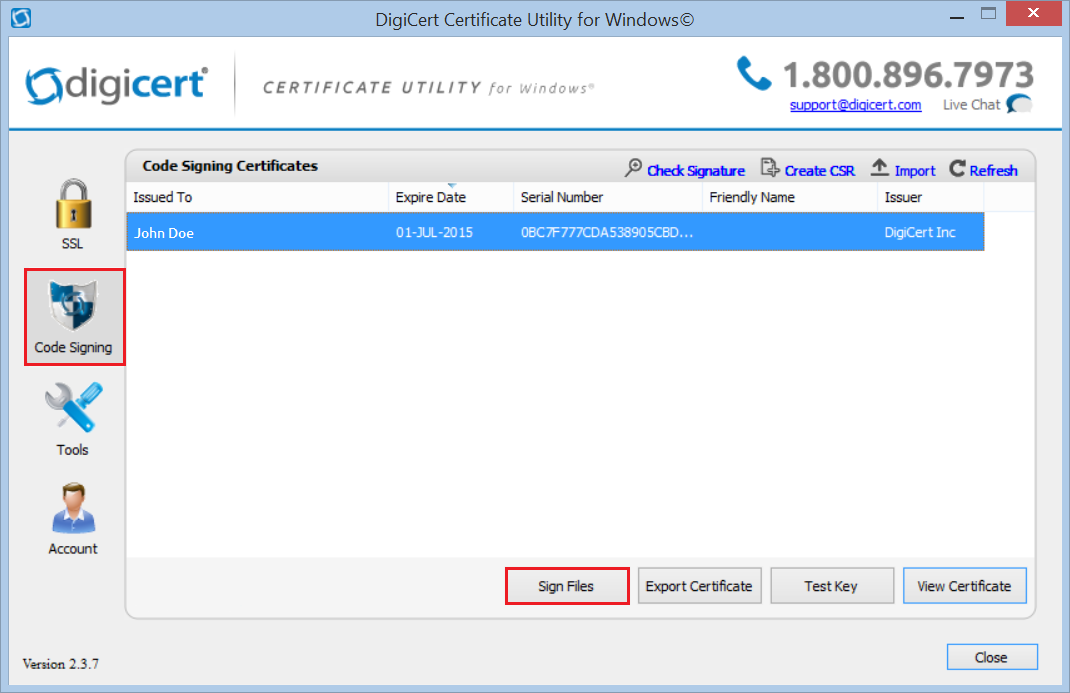
In the Code Signing window, click Add Files, then browse for and select the file that you want to sign.
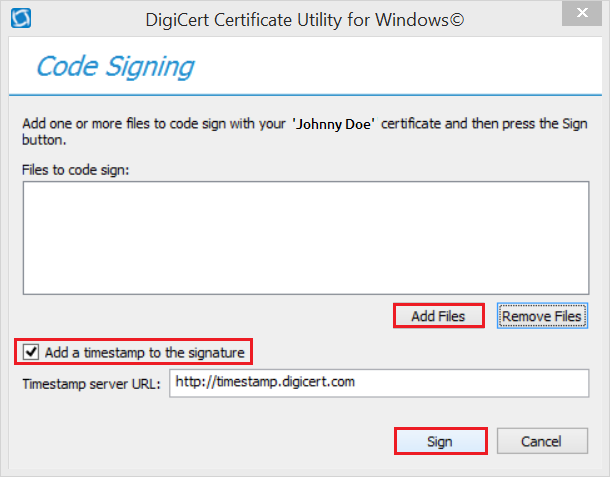
Next, check Add a timestamp to the signature if you want to time stamp your signature.
To add a timestamp, you must be connected to the Internet.
Adding a timestamp allows your signature to remain valid after the Code Signing Certificate has expired, as long has the code remains unchanged.
(Optional) Check Kernel Mode Signing if you are signing a kernel mode driver.
Depending on the format that you selected for your certificate, you may not see this option.
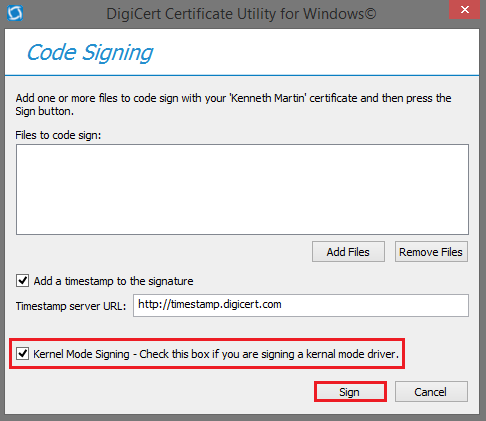
Finally, click Sign.
When you receive the “All the files have been successfully signed” message, click OK.
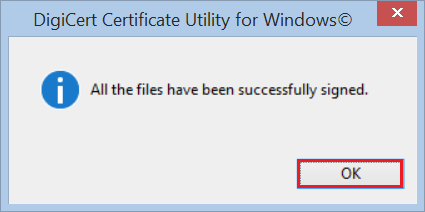
- Congratulations, you should now have a freshly signed piece of code, ready to use!
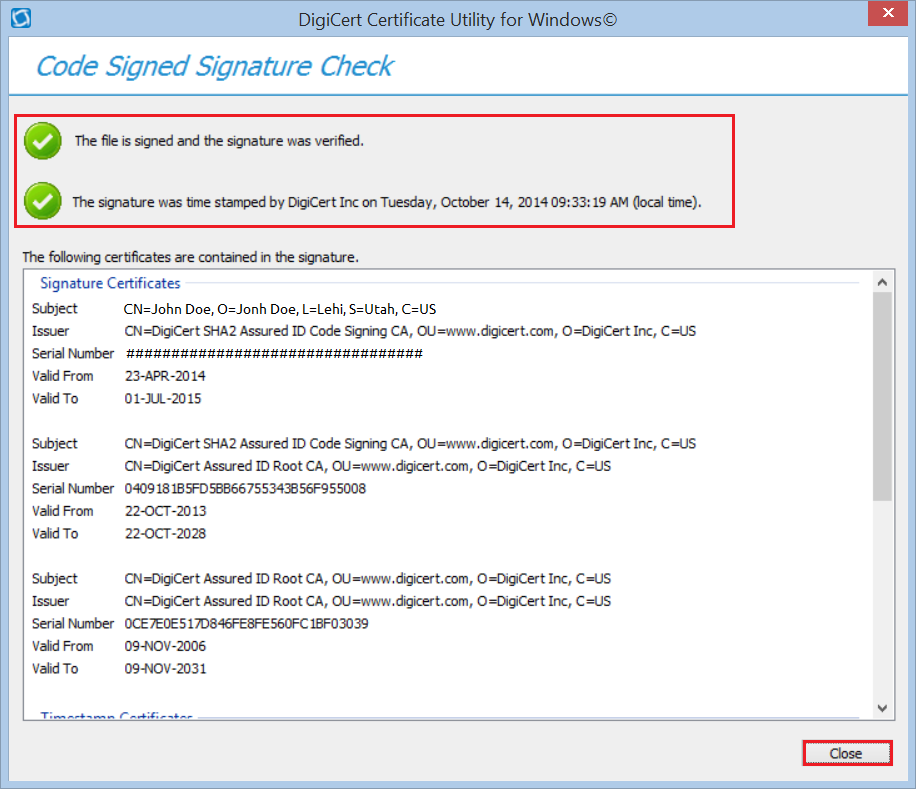
How to Check Your File’s Signature
In the DigiCert Certificate Utility for Windows©, click Code Signing (blue and silver shield).
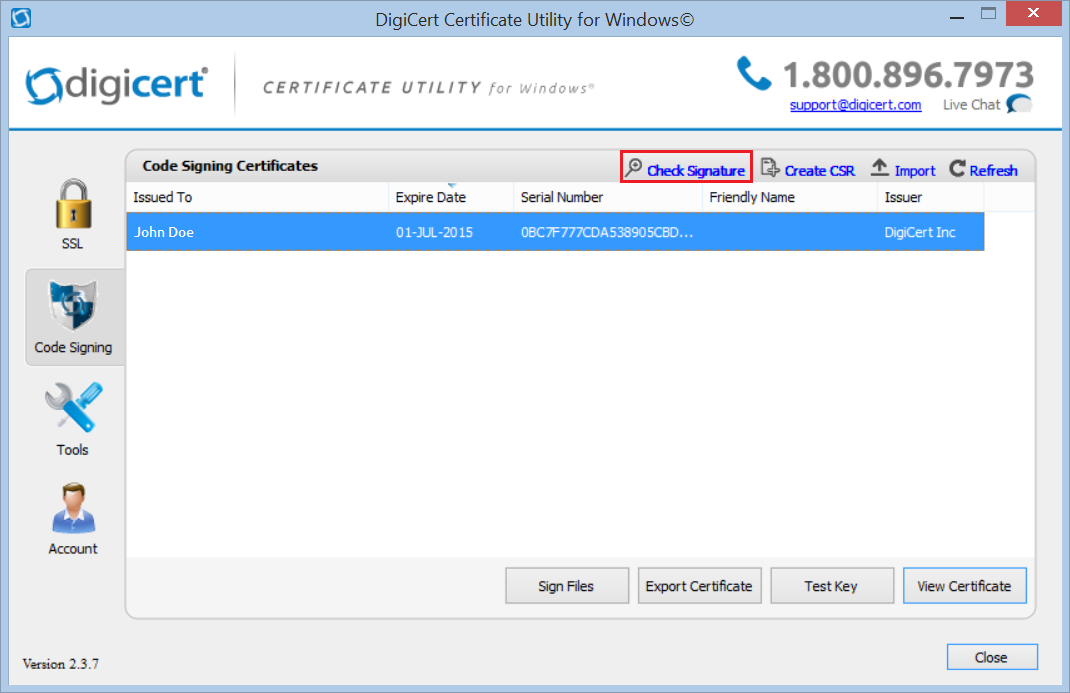
Next, click Check Signature to select and open the file whose signature you want to check.
In the Code Signed Signature Check window, you should see a green checkmark for “The file is signed and the signature was verified”.
If you checked Add a timestamp to the signature, you should also see a green checkmark for “The signature was time stamped by DigiCert Inc on ‘Date and Time’”.
If you checked Kernel Mode Signing, the page will contain Kernel Mode Cross Certificate information.
InstantSSL Certificate Installation: Microsoft ISA 2000
Please also refer to the Microsoft website for details
Installation Instructions for Microsoft ISA 2000 Server
How to setup Internet Security and Acceleration Server to Host Web Sites by using the Secure Sockets Layer (SSL) Protocol. This information applies to: Microsoft Internet Security and Acceleration Server 2000
You must first export the SSL certificate of the Web site with the associated Private Key. If you do not have this key, ISA server will not allow you to use this certificate for SSL:
Open a blank Microsoft Management Console (MMC).
Add the Certificates snap-in.
When requested, select the options for ‘Computer Account’ and ‘Local Computer’.
Expand Personal, and then expand Certificates. You should see a certificate with the name of your Web site in the ‘Issued To’ column.
Right-click on the certificate, select All Tasks, and then select Export.
On the Export window, click Next.
Click Yes, ensure you select ‘export the private key’, and then click Next.
NOTE: If you do not have the option to export the Private key then the private key has already been exported to another computer or the key never existed on this computer. You cannot use this certificate on ISA Server. You must request a new certificate for this site for ISA Server.
Select the option for ‘Personal Information Exchange’, and then click to select the appropriate check boxes for all three sub-options.
Assign a password and confirm it.
Assign a file name and location.
Click Finish.
NOTE: Ensure that you keep the file safe the SSL protocol depends upon this file.
Copy the file that you created to ISA Server.
On the ISA Server, open the MMC:
Add the Certificate snap-in, as previously instructed.
Click the Personal folder.
Right-click All Tasks, and then click Import.
Click Next on the Import Wizard.
Ensure that your file is listed, and then click Next.
Enter the password for the file (created earlier).
On the sub-option, click to select the ‘Mark the private key as exportable’ check box.
Leave the import setting on ‘Automatically’, and then click Next. Click Finish.
Now you will need to import the root and intermediate certificates.
Click the Start Button then select Run and type mmc
Click File and select Add/Remove Snap in
Select Add, select Certificates from the Add Standalone Snap-in box and click Add
Select Computer Account and click Finish
Close the Add Standalone Snap-in box, click OK in the Add/Remove Snap in
Return to the MMC
To install the Root Certificate supplied in the zip file:
Right click the Trusted Root Certification Authorities, select All Tasks, and select Import.
Click Next.
Locate the Root Certificate and click Next.
When the wizard is completed, click Finish.
To install the Intermediate CA Certificate:
Right click the Intermediate Certification Authorities, select All Tasks, and select Import.
Complete the import wizard again, but this time selecting the Intermediate CA Certificate when prompted for the Certificate file.
Ensure that the Root certificate appears under Trusted Root Certification Authorities and the Intermediate CA file appears under
Intermediate Certification Authorities.
Important: You must now restart the computer to complete the install.
Under the Personal folder, when a subfolder called ‘Certificates’ is displayed, click Certificates and verify that there is a certificate with the name of the Web computer.
Right-click the certificate and then click Properties.
If the ‘Intended Purposes’ field of the certificate is set to ‘All’ rather than a list of specific purposes, the following steps must be followed before the certificate can be recognized by ISA Server:
In the Certificate Services snap-in, open the Properties dialog box of the relevant certificate. Change the Enable all purposes for this certificate option to the Enable only the following purposes option, select all of the items, and then click Apply.
Open the ISA Manager and complete the SSL install:
Right-click the server accepting the incoming connection, and click Properties.
Click the Incoming Web Requests tab.
Click the Internet Protocol (IP) address entry for the site that you are going to host, or the ‘all IP addresses’ entry if you do not have individual IP addresses set up.
Click Edit.
Click to select the Use a server certificate to authenticate to web users check box.
Click Select.
Select your previously imported certificate.
Click OK.
Click to select the Enable SSL listeners check box.
Expand the ‘Publishing’ folder and click on Web Publishing Rules.
Double click on the Web Publishing Rule that will route the SSL traffic.
On the Bridging tab, choose the option to Redirect SSL requests as: ‘HTTP requests (terminate the secure channel at the proxy)’. Click OK.
Restart ISA Server. (note this means a reboot of the server itself not a service restart)
Installing the Root and Intermediate Certificates
If you have any problems with the installation of your certificate on IIS 4x, check you have installed the root and intermediate certificates
InstantSSL Certificate Installation: Microsoft OWA (Outlook Web Access)
Securing Your Outlook Web Access 2000 Implementation Using SSL
Certificate Installation
- Open Internet Services Manager from your Administrative Tools.
- Open the Properties for the Web Site that is hosting OWA (normally the Default Web Site).
- Select the “Directory Security” tab and then click on the “Server Certificates” button.
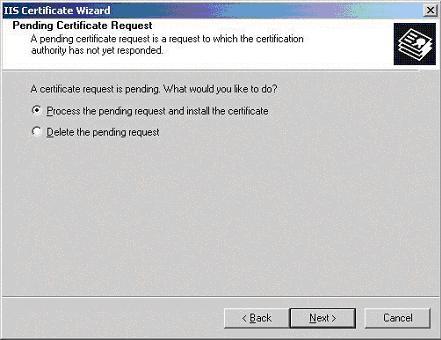
- You will now be presented with the “Pending Certificate Request” dialogue box (below), select “Process the pending request and install the certificate“, click Next.

- The “Process a Pending Request” dialogue box will appear (below), navigate to the site certificate that you received. click Next.
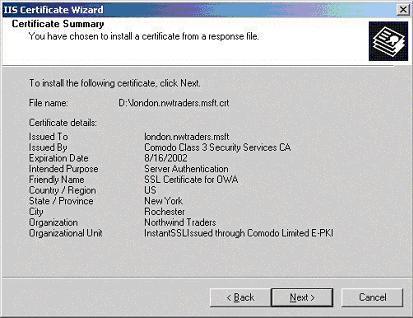
- You will now be presented with the “Certificate Summary” (below), click Next.
- Next you will need to install the intermediate certificate, please follow the instructions :
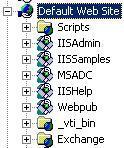
- Using the Internet Services Manager, open the properties for the “Exchange” virtual directory.
- Select the “Directory Security” tab and the click on the “Edit” button in the Secure Communication section.
- In the “Secure Communications” dialogue box (below), check the box “Require Secure Channel (SSL)“, you could also check the box “Require 128-bit encryption“, if you do check the 128-bit checkbox, any browsers that do not support 128-bit encryption will be unable to connect to OWA.
Please see the Microsoft article regarding forcing the use of SSL with OWA
One final step that you may need to take is to ensure that your Firewall is configured to allow HTTPS (port 443 by default) to pass through.
Installing the Root and Intermediate Certificates
If you have any problems with the installation of your certificate on IIS 4x, check you have installed the root and intermediate certificates correctly, by following the instructions here: https://support.comodo.com/index.php?_m=knowledgebase&_a=viewarticle&kbarticleid=487
InstantSSL Certificate Installation: Plesk 6
uploading certificate parts
if you have already obtained a certificate containing private key and certificate part (and may be ca certificate), follow these steps to upload it:
at the certificate repository page, click on the add button. you will be taken to the ssl certificate creation page.
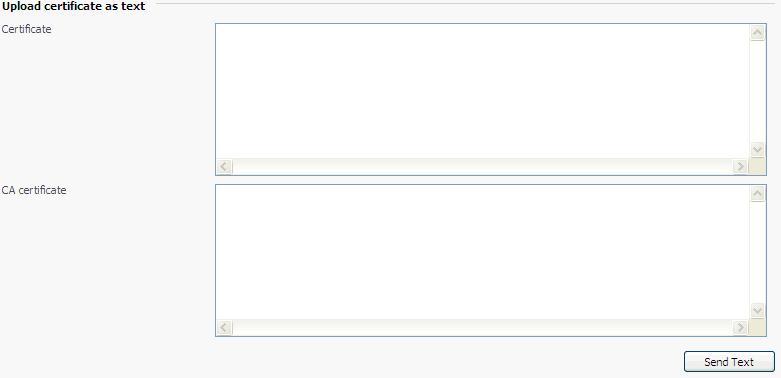
in the upload certificate files section of the page, use the browse button to locate the appropriate certificate file or a required certificate part.
click send file. this will upload your certificate parts to the repository.
you can upload an existing certificate in two ways:
choose a file from the local network and click on the send file button (.txt files only).
type in or paste the certificate text and private key into the text fields and click on the send text button.
uploading a ca certificate
the intermediate ca certificate or rootchain certificate is used to appropriately identify and authenticate the certificate authority, which has issued your ssl certificate. to upload your ca certificate, follow these steps:
at the certificate repository page, select a certificate from the list. you will be taken to the ssl certificate properties page.
use the browse button, within the section related to the certificate uploading, to locate the appropriate intermediate ca certificate file.
click send file. this will upload your ca certificate to the repository.
you can upload an existing certificate in two ways:
choose a file from the local network and click on the send file button (.txt files only).
type in or paste the ca certificate text into the text field and click on the send text button.
note: when you add a certificate, it is not installed automatically onto the domain or assigned to an ip address, but only added to the certificate repository. you can assign a certificate to an ip address at the client’s ip pool, at the ip aliasing management page, and during hosting creation on an exclusively granted ip.